Today is my first....TUTORIAL! I'm so excited to share what I've been working on. I began trying to make something for my sister who just had her 3rd baby boy. I wanted to make them something cool so that all three boys could be matchy-matchy. I played around with a lot of different ideas, but decided that it'd be cool to have their initials appliqued on something. I saw a few patterns that I could purchase, and a few tutorials for other regular shirts, but I LOVE this baseball-style shirts, especially on active little boys. So, I picked up one of my son's, size 4T shirts and drew up my own pattern. AND...I didn't stop there. I didn't want to spend more on fabric to make my own then I'd have to, so I sent my husband to his closet to pull out old shirts that he wasn't wearing anymore...and VIOLA! I had knit fabric that was already finished on the bottom (even better). It worked out GREAT! I LOVE upcycling! :) Go
here AND
here to find finished pics!


First, grab a shirt in the size you are desiring. And make draw a pattern. I like to draw the pattern on newspaper, but you can use whatever you'd like. You'll need a pattern for a sleeve, the bodice (one piece will work for the front and back), and a collar. I chose to do the sleeve first. Lay out the shirt and draw around it. I drew a little outside of the shirt to accommodate for a small seam allowance. I didn't want a seam along the top of the sleeve, so I knew that the top part was going to have to be pretty straight so that I could cut it out on a fold.

Next, draw the pattern for the bodice. I also planned on cutting the bodice on a fold, so I folded my original shirt in half and cut the pattern for that piece. The pattern should be half of the front or back.
Next for the collar. The collar is probably the trickiest. You can try to cut the pattern for the collar by using your original shirt. However, I figured out how tall I wanted the collar (1 inch) and added 5/8 inch for seam allowance. Then I multiplied this by 2 (1 5/8 X 2 = 3 1/4"). This is how tall the collar is.
Then I measured the neckline of the bodice and multiplied by 4 (because your pattern is only half of the front) And also add the small amount of the neck-edge of the sleeve. So, now you should have a pattern for the bodice, sleeve and collar.

Next, grab your t-shirt and cut out your pieces. You should cut out 2 bodice pieces (on folds), 2 sleeve pieces (on folds) and 1 collar piece. **If you can cut the bodice out of the bottom part of your old t-shirt, you won't have to finish the bottom.....if you cannot do this, you have to cut your pieces extra long to accommodate for the seam.
Now, for the fun part...the sewing! First, let's work a little on the collar. Sew the ends of the collar together, right sides together to make a circle. Then fold the collar in half lengthwise WRONG sides together! Sew a 1/2" seam (see pic). Then set the collar aside for a little while.

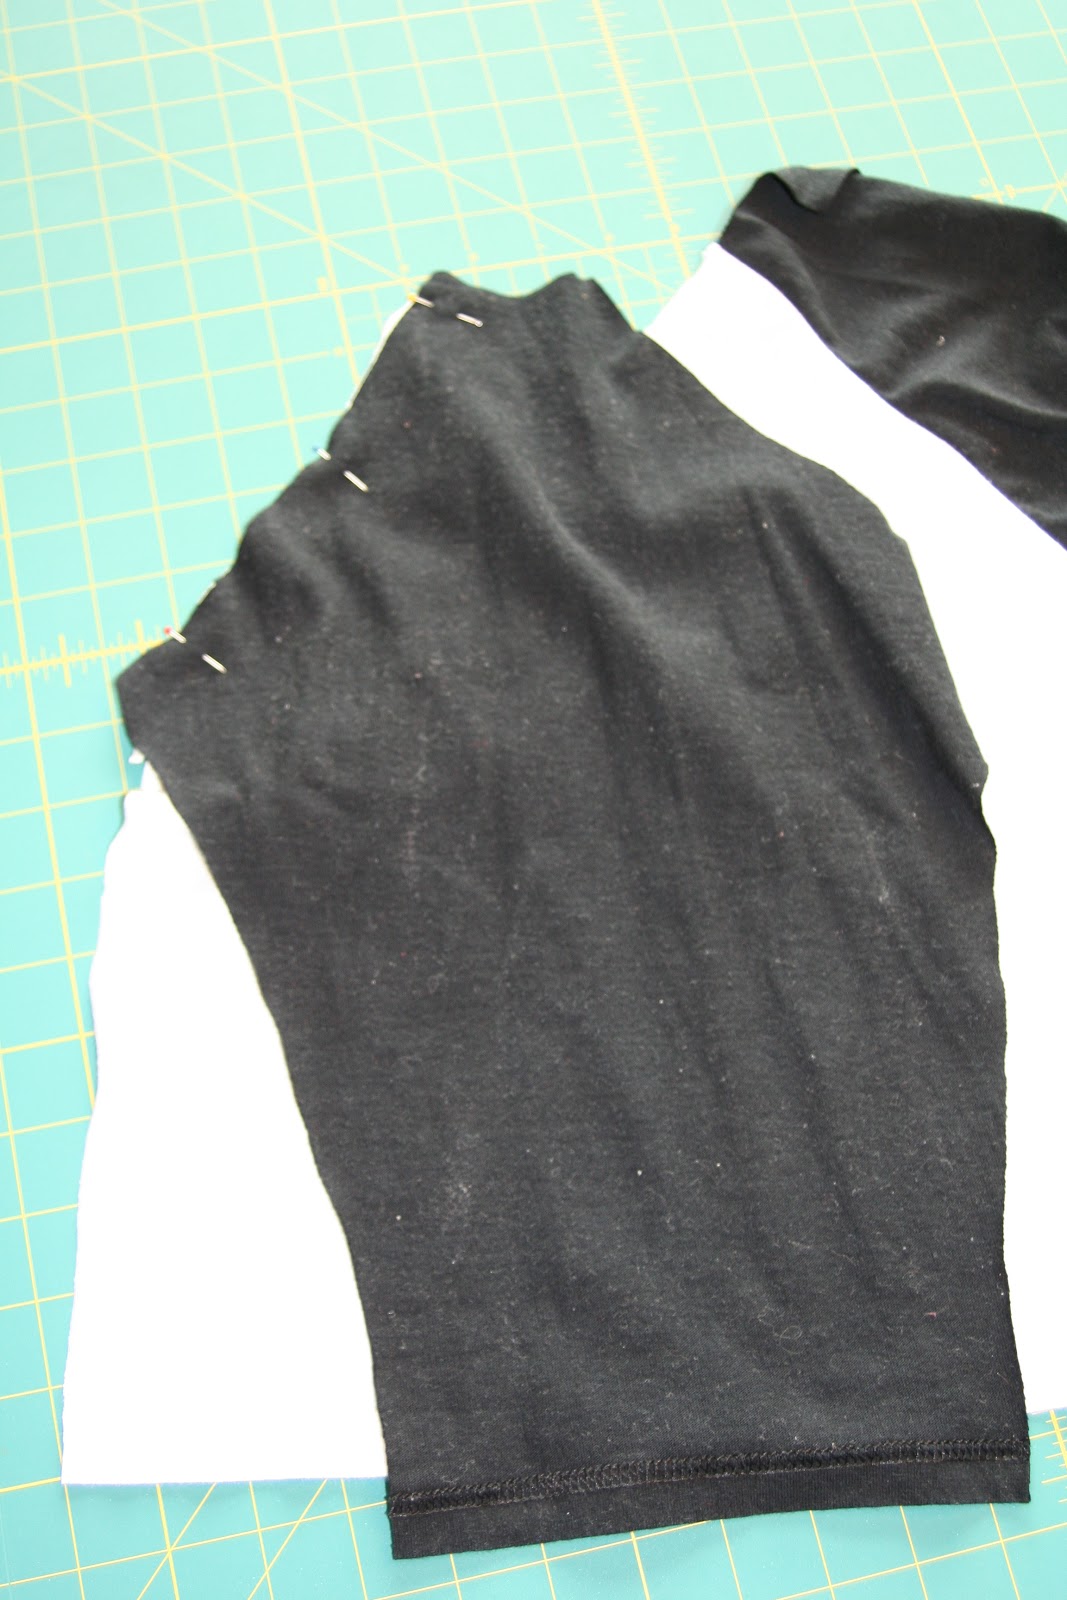
Now, take one sleeve and lay it on one of the bodice pieces, right sides together, pin and sew. (***I used my serger, but if you don't use a serger don't worry. I would just do a zig-zag stitch across each piece before you sew them together to finish the edges so they don't roll on the inside of your shirt***). Repeat these steps to add a sleeve on both sides of the front, and then add the back piece to the sleeves as well. It should look like the picture on the left.
Now, you need to make a decision. If you want the ends of your sleeves finished and they are not finished, you CAN fix them now. It's not quite as clean, but MUCH simpler than finishing the sleeves when the opening is so much smaller. Either way, it works...and you can leave it unfinished if you'd like.

Next, fold the shirt right sides together. Match up the bottom of the front and back as well as the sleeves. Be sure to pin before you slow, because you want to make sure that you match up where the sleeve and the bodice meet (at the armpit). Start at the bottom of the shirt and sew up the shirt, armpit and down the sleeve to the end of the sleeve.
Almost done! :)
Next, we need to sew the collar on. First, pin the collar on the right side of the shirt. Don't worry if it's not exact as knit is forgiving. Stitch the collar on, using a 5/8" seam allowance. This seam allowance will allow you to cover up your original stitch. Once stitched, you can clip the curves if you'd like to help the collar lay down nicely. Just be sure not to clip the 5/8" stitching.
Once stitched, turn you color up and stitch as close as you can around the shirt and shoulder pieces and catch the seam of the collar.
Now, you are done or ready to embellish the shirts as you wish. Once I get pics, I'll share the embellished shirts I made for my nephews! :) Happy Upcycling and Sewing!
Any questions or comments are welcome!